MATLAB Models in DOME
This tutorial assumes that you have DOME installed and that you are able to run DOME client and server. If you need to install DOME follow the tutorial Installing and Launching DOME
This tutorial assumes that you have an excel file with the description of the model.
BUILD THE MODEL
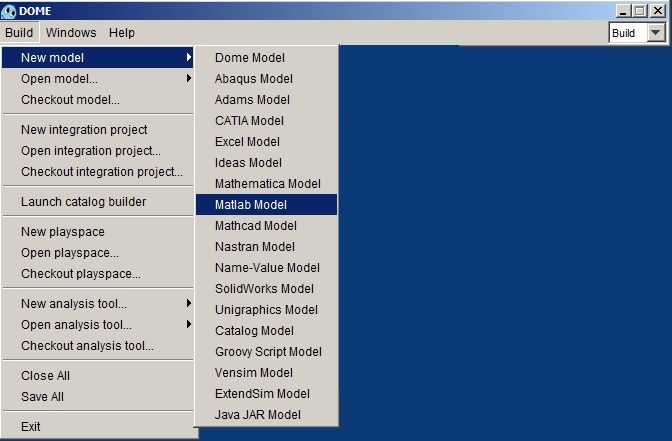
Step 1: From the dome window choose Build, on the top right.

Step2: Choose the option Build > new Model > Matlab Model, on the top left.
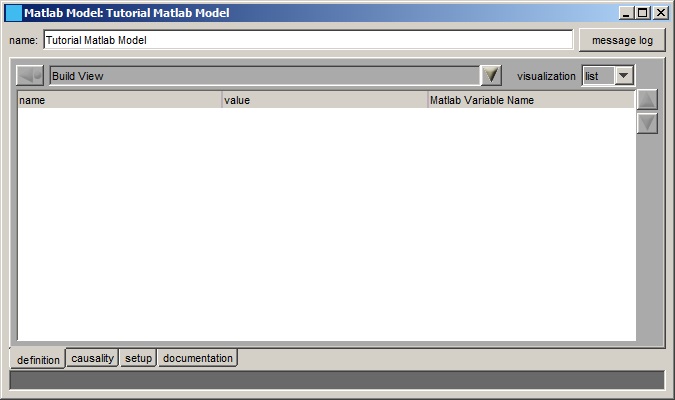
Step 3: Put a name to the model as Tutorial Matlab Model as shown below
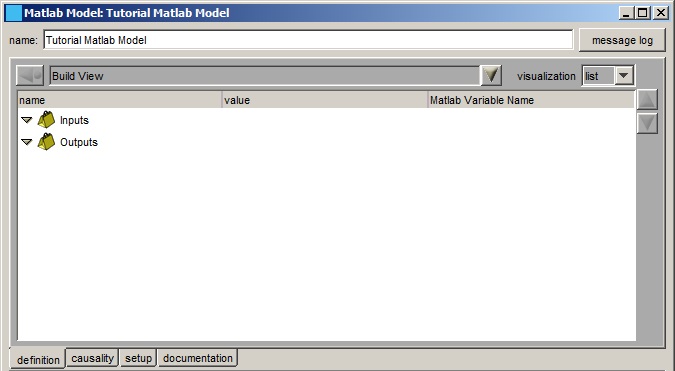
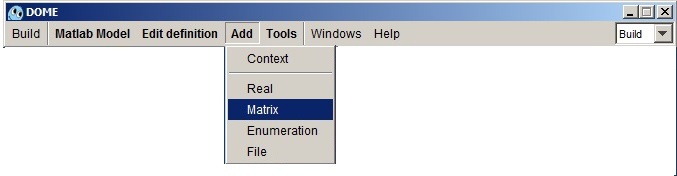
Step 4: Now lets add some context to the model. Go to Add, Context . Do it two times. You will see two Contexts added as shown below.


Step 5: Put meaningful names to the Context. We have put them as Inputs and Outputs, basically defining what we would send to the Matlab model as inputs and what we expect from the model as outputs
Step 6: Now we want to define what we call as inputs and outputs. Let's start by double clicking "Inputs" which will open a window for the context as shown below. Add two Real variables, by choosing Add, Real.
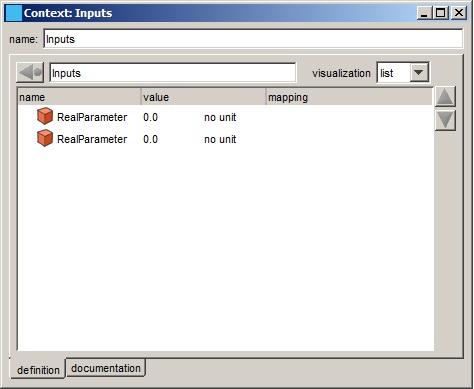
Double Click the "RealParameters" so you can give a meaningful variable name such as Intercept for the first one and Slope for the second one. Close the window.
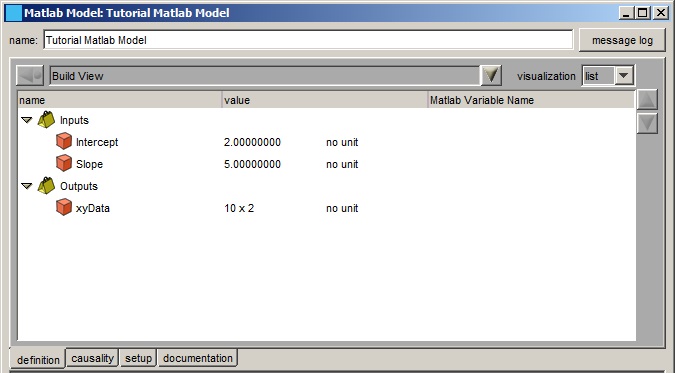
Step 7: Repeat the same for "Outputs", same as step 6 but double click Outputs . But this time for the variable type do Add, Matrix. Name the variable as xyData
Step 8: Assign some values to the variables defined in the contexts. For the matrix size, make sure your Matlab model is returning a matrix of the same size you define here.
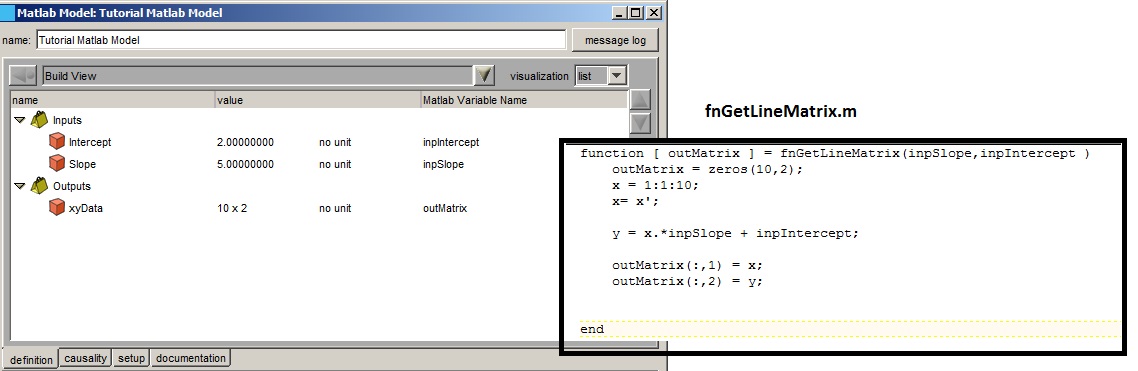
Step 9: This is important step because you have to know the matlab script that will be running the Dome Model inputs and receiving the outputs . The name of the Dome variable is important , the order in which they are defined is not important. The figure below shows the matlab script, and it is good to keep the script open so the Dome Model can be defined accurately.
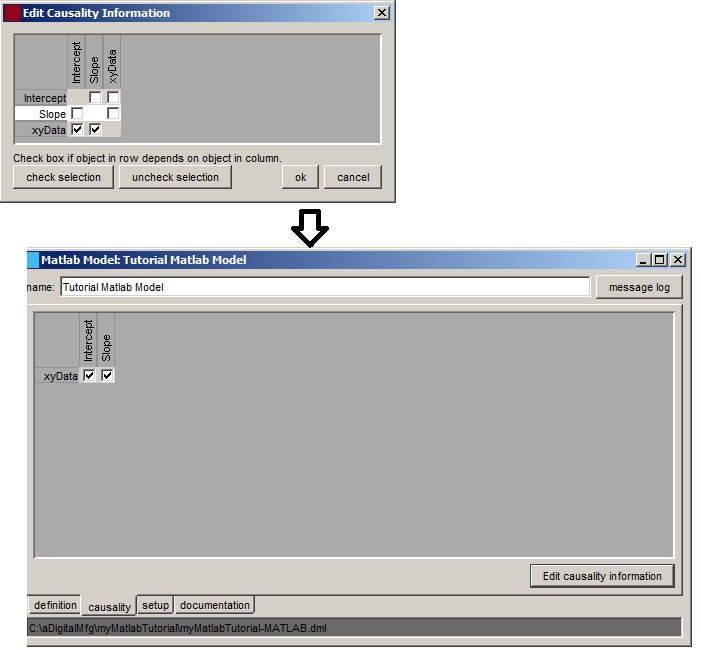
Step 10: The causaility has to be defined. Click the "causality" tab at the bottom and click Edit Causality button. Dome will show all the possible combinations for the variables but we know that the Matlab model needs the Slope and Intercept to get the output matrix, the slope is not dependant on the intercept, so place the check marks accordingly. Press ok button and the screen that follows show only the relevant connections to the variables.
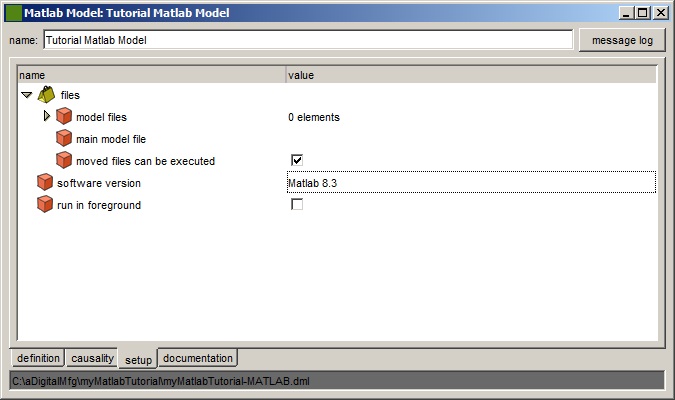
Step 11: A very important step that selects the Matlab version which the Dome Server can handle. This tutorial was done in a Windows 7, 64 bits machine. The MatlabPluginR2014.DLL exists in the dlls folder and this DLL is needed for the Matlab model to work.
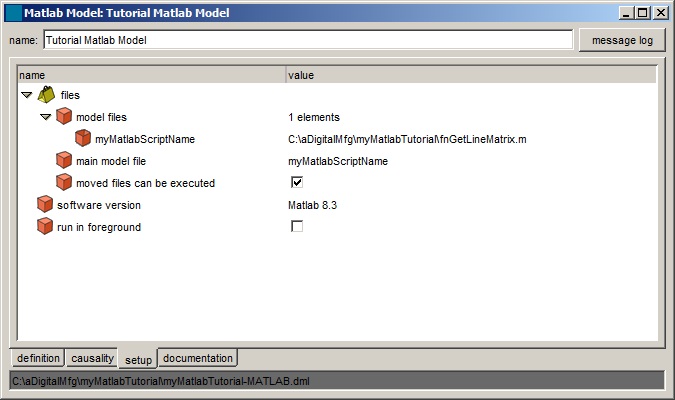
A. Choose the "setup" tab at the bottom of the screen. See screen below and make sure you have chosen Matlab 8.3 ( which corresponds to Matlab 2014A. Note that Matlab has their versioning methodology https://en.wikipedia.org/wiki/MATLAB ). Our plugin DLL is named MatlabPlug2014.dll. If we have to support Matlab 2014B we would name that plugin as MatlabPlug2014_B.dll.
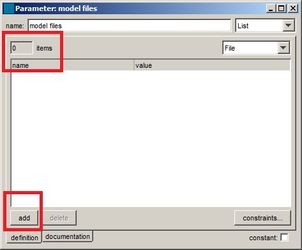
B. Now we have to setup the "model files" correctly. Click the icon next to "model files" and click the add button. Note that the number of items should now be 1 ( see the red box )
C. Now start with the icon next to FileParameter, which will bring you to the window "Parameter:FileParameter". Make sure you update the file path for the Matlab Script name.
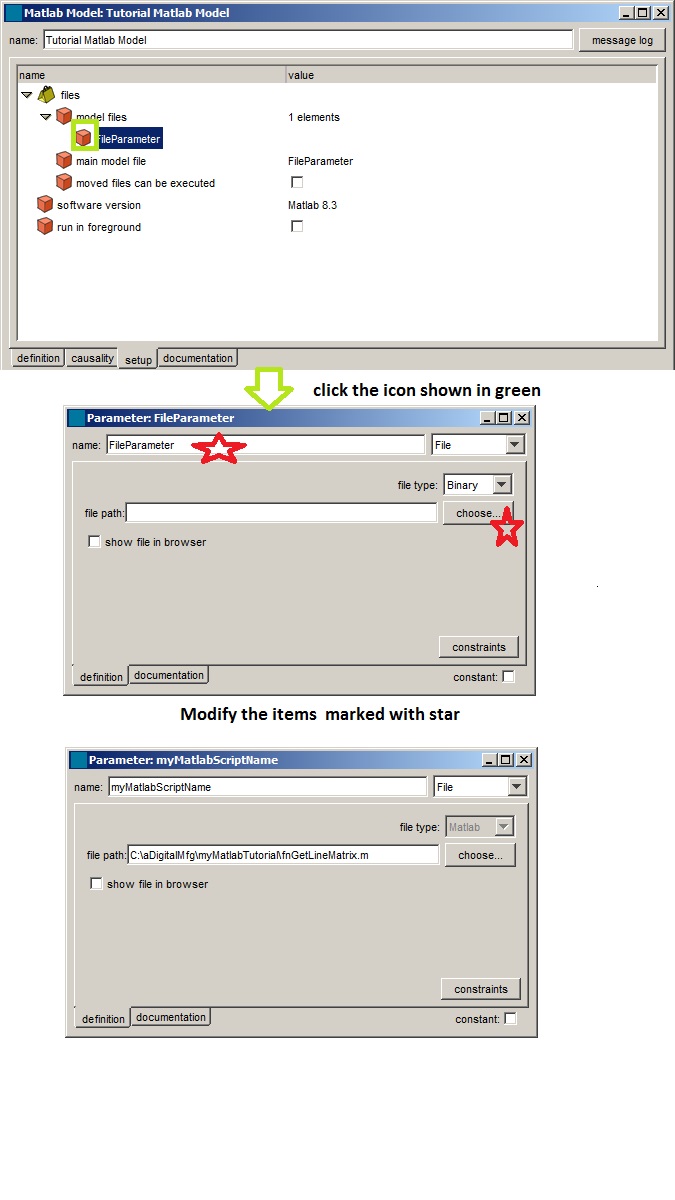
D. Final check on the Setup data. We should have atleast one model files, the matlabScriptName should be pointing to the right file, software version has to be correct. After this DO NOT FORGET to save the matlab model.
CREATE AN INTERFACE
In this step you will create an interface for the model that you completed in the previous step. Interfaces are the exposed views of a model made available to run-mode users. The process of building interfaces is the same for DOME models, plugin models, and integration projects. Therefore, this step of the tutorial refer to the DOME model tutorial.
Once the interface is built the wrapper model is ready for deployment.
DEPLOY THE MODEL
In this step you will move the model and interface files that you saved in the previous step to a server where they can be executed by remote users. The deployment process is the same for any type of model, so refer to the DOME model tutorial. Remember, you need to deploy the Excel model to a server running the version of Excel that you chose when you built the excel model.
Once the model is deployed you can run it.
RUN THE MODEL
Refer to the DOME model tutorial.
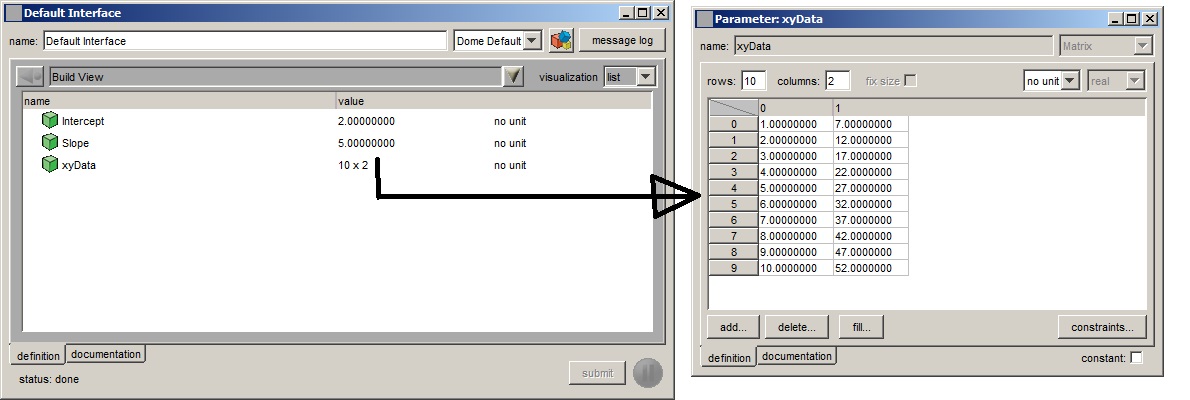
Here is how a Default Interface for the Model will look like when you run it. The green color background suggests that you can change the values. The red color background suggests that the value comes from the model. Press the submit button.
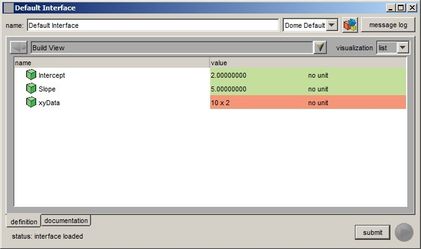
After you press submit button, the interface shows the data with no background colors. If you double click the xyData, you will see the x values from 1:10 and the y values are based on the slope and intercept.