Workspaces (Projects)
A workspace on the Digital Manufacturing Commons Platform is a location where one can manage a their project team, have discussions, create and manage tasks, and be able to store and run services/applications. Workspaces can be both private or public and open to the community.
Creating a Workspace
Prerequisites
In order to create a workspace, your account needs to be associate with an organization. During the onboarding process you, should have been prompted to choose your organization or create one if yours did not exist in the list by choosing OTHER. You need to have also accepted the DMC Terms an Conditions as well. If for some reason you are not associated with an organization you can fix this by going to the "My Account" section, choose an organization and click on the green save button in the right hand corner of the form.
Workflow
In order to create a workspace, visit the "My Workspaces" section of the site. This can be found by click on your username in the top right-hand corner of the site and choosing My Workspaces from the drop-down list.
 in the past could be accessed here")

Using one of the methods above, visit the Workspaces page. When visiting the first time the page will be blank.
Click on the Add Workspace button.
You'll be directed to the Workspace Creation form.
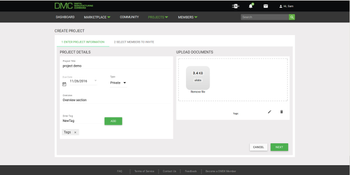
Go through the first part of the form and fill in all the following fields: Project Title, Project Overview, Due Date, Type.
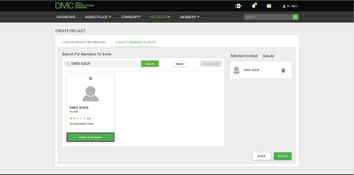
One the second part of the form, add all of the individuals that you would like to add to your new workspace by click on the Add to Invitation button under their card.. When you are finished adding people to your workspace, click on the green Create button at the bottom right corner of the page.
- During the workspace invitation process, if you add someone you did not intend to add, clicking on the garbage can icon on the right hand side next to the person's name you want to remove, or clicking on the green Add to Invitation button under the person's card will remove them from the list of invitation recipients.
- If you can not find the person you are looking for on the list to add to your workspace, you can use the search field to help you more quickly find your invitees.
Project Types
Accessing Public and Private Workspaces
Private Workspaces
As mentioned briefly above, a workspace can either be private or public to the DMC community. A private workspace is not visible to anyone other than yourself and anyone else you had sent an invitation to during the workspace creation process or the workspace editing process.
Public Workspaces
There are two kinds of public workspaces. They are:
- Workspaces that can be joined by anyone in the DMC community.
- Workspaces that can be joined with the approval of the Workspace Creator.
Workspace Invitations
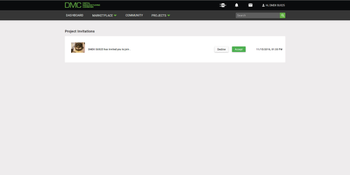
After a workspace is created and individuals were added during the workspace creation or editing process, individuals will receive an invitation and must accept it in order to be able to visit a private project, and to join a public project they were invited to. Where the invitations can be found and accepted/declined is noted in the images below.
Joining Public Workspace
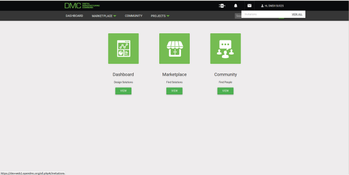
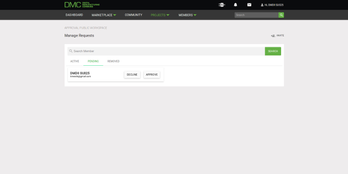
In order to join a public workspace, you will first need to visiting the All Workspaces page. You will be able to then see all public projects. View the image below to see how to find the All Workspaces page. Clicking on the workspace name will then redirect you to the Workspace. To gain access to the workspace you need to either Request to join a public workspace with administrator approval or simply join the public workspace.
Below shows the workflow of how to join an Anyone can Join: Public Workspace.


Below shows the worflow of joining a public workspace that requires the Workspace creator's approval.

Your Workspaces
Once you are part of a workspace, those workspaces (public and private) will appear in the My Workspace section of the website.
Workspace Modules
Workspace Menu
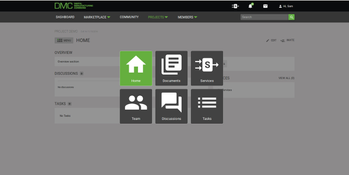
The workspace menu allows you to quickly explore and make changes to your workspace. This can be brought up by visiting your particular project and clicking on the menu button on the left hand side of the page.
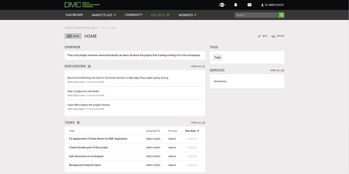
Home
This is where you can get access to an easy to navigate dashboard relating to: project overview, Discussions, Tasks, Tags, and Services.
Documents (Advanced Document Management)
Users part of a workspace can upload documents part of their project here. Additionally individuals are able to create folder structures i addition to having version control on each of their uploaded files.


Services
These are applications that can be ru in te context of your workspace and project.
Team
This is where team members can see all individuals that are part of the workspace and where administrators can manage access the individuals have to the workspace.
- Keep in mind that if a user is removed from a workspace, they will not be able to be re-added to the workspace.
In order to add more members to a workspace, in the case more people need to be added to the workspace, the workspace creator needs to click on edit in the context of the workspace, if any other things need to be updated ate this time such as the due date, or the project overview, this can be done now, then click on the green next button on the bottom right hand portion of the form, add the individuals you would like to have access to your workspace, then click on the green save button in the bottom right hand corner of the form.
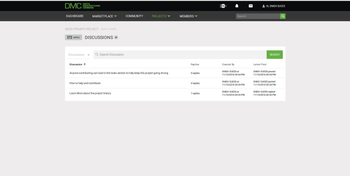
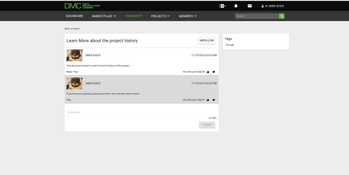
Discussions
Discussions are much like a forum that you can have in the context of the project you are working on with your team. Any team member is able to leave a comment on a discussion in addition to being able to like or dislike comments. Individuals' profile picture and name appears next to the name and comment written by the individual. There is no limit on the amount of discussions that can be created in a workspace nor on the comments in those discussions.
Tasks
The tasks section is used in order to track the work being done on a project. The task creator is able to list a priority level, a due date, and the person responsible for completing the task, Additionally, you are able to track the progress of the project being in progress or complete.
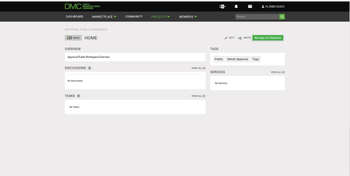
Workspace: Home

Project Overview
This section is used to provide overview of the project your are trying to complete in your workspace.
Discussions
Discussions are much like a forum that you can have in the context of the project you are working on with your team. Any team member is able to leave a comment on a discussion in addition to being able to like or dislike comments. Individuals' profile picture and name appears next to the name and comment written by the individual. There is no limit on the amount of discussions that can be created in a workspace nor on the comments in those discussions.
Tasks
The tasks section is used in order to track the work being done on a project. The task creator is able to list a priority level, a due date, and the person responsible for completing the task, Additionally, you are able to track the progress of the project being in progress or complete.
Tags
Tags are used to show individuals that are part of your project or others who can view your project, what your project is aiming to solve, and anything else interesting that may help to distinguish tour project from another one.
Services
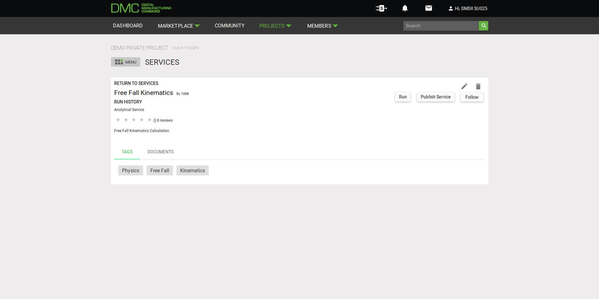
Services
Services are applications that can be added to a workspace to help solve parts of your project. These applications have a simple user interface that allow for your to have analytics run in the background without the need of installing an programs or need to licenses. In the near future, you a will be able to tie particular application together to create new, special services.
Registering Service
The process of registering a service is used mostly for developers or indivuduals that want to add services to their projects that are not accessible in the DMC Marketplace.
Marketplace Applications
After a workspace has been created, by visiting the marketplace, you can add services to your project which can be run in the context of your workspace.
Running Services
To run a service, go tot the services section on the workspace Home page, and choose to run a service. The new page will load, here enter your inputs and when ready click run. Your application run will be queued and when the job is done, you will be notified of this. If you wait on this page, your job will be processed and you will see the results on screen.